


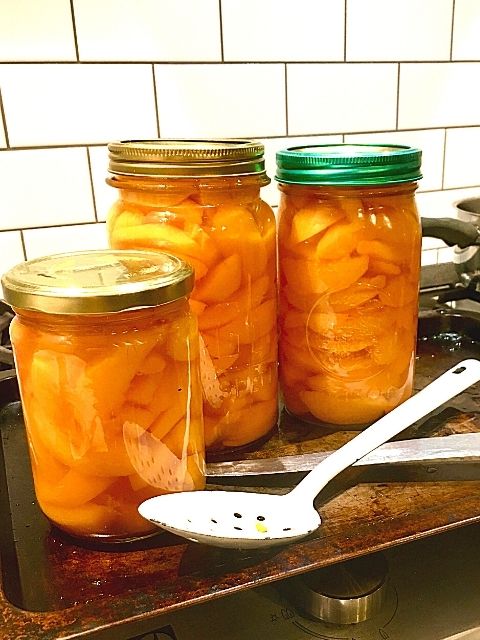

How to Bottle Fruit Step by Step
Want to learn how to bottle and preserve seasonal fruit simply and cheaply? This easy step by step method will let you enjoy enjoy the seasons surplus throughout the year and the only equipment you need are jars, seals and a big saucepan.
Use this method for stone-fruit - peaches, apricots, nectarines... pip-fruit like pears or apples, even exotics like pineapple. I prefer a light syrup for preserving fruit so the fruit flavours are not overpowered by the sugar so I use a ratio of 1 cup of sugar to 3 cups of water.
To fill a standard large preserving jar you will need around 1 kg of fruit.
Prepare the jars and seals
Sterilise the jars you intend to use by placing them in an oven heated to 120°C for at least 15 minutes. Keep them in the oven at a low heat till required.
Prepare seals by soaking in boiling water till flexible. The seals should have a plastic lining on the inside. If re using old ones discard any that have rust spots.
Make the syrup
You will need enough syrup to cover the fruit. I use a ratio of 1 cup of sugar to 1 cup of water – Combine the sugar and water in a large pan and bring to a gentle simmer, increasing the amounts to make enough to cover the prepared fruit.
- Apricots: Wash, cut into halves and remove the stone
- Peaches: Peel and slice or, if small leave them whole
- Plums: Wash and cut into halves, remove the stone or leave whole
- Pears: Peel, cut into halves or quarters and remove core
- Pineapple: peel and chop as desired – chunks, rings...
To cook and bottle the fruit
Simmer the prepared fruit in the syrup until just tender when pricked with the point of a knife. Slightly under ripe fruits are easiest to peel and cook and will develop good colour and flavour once cooked.
Use tongs to take a sterile jar out of the oven and place it in a heat proof dish. Pack the fruit into the hot jar in neat layers. When the jar is full to the brim, top up with hot syrup then then slip a long flexible knife down the insides of the jar to release air bubbles.
Top up with hot syrup till overflowing to prevent any air being trapped – you don’t want any “head space’ at the top, then press a seal firmly on and quickly screw the band in place. As the contents cools a vacuum is formed. The seal will contract and become slightly concave and will give a reassuring pop, confirming the contents are fresh when you come to open the jar.
Set the jars aside to cool. When completely cool, wash the sticky syrup off the sides, add a label with the date and store until required.
Trouble shooting
If your seal does not form a vacuum when cool the filling was not hot enough. Remove seal and reheat in boiling water, place the full jar in the microwave and heat till filling is boiling hot. Pour boiling water into the top of the jar until it overflows (yes over the top of the existing fruit and syrup, you are just topping up and ensuring a good seal). Replace the seal in the manner described above.
It is unlikely that you will have exactly the right quantity of fruit to perfectly fill all your jars to the brim. I invariably find I have a half jar that needs to be stored in the fridge.